
Body
After your certificate has been imported in the Microsoft Edge, you can save a back-up copy of the certificate and create a password which is different with the default one and easier for you to remember.
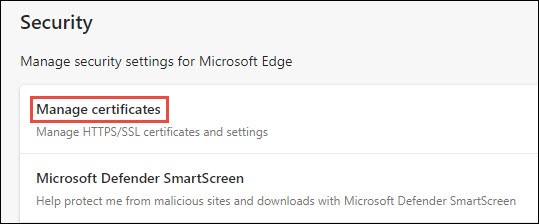
1. Open Microsoft Edge, click on Settings and more icon ![]() in the upper right corner > click the menu icon
in the upper right corner > click the menu icon ![]() > select Privacy, search and services > scroll down to Security > click Manage certificates
> select Privacy, search and services > scroll down to Security > click Manage certificates
Image
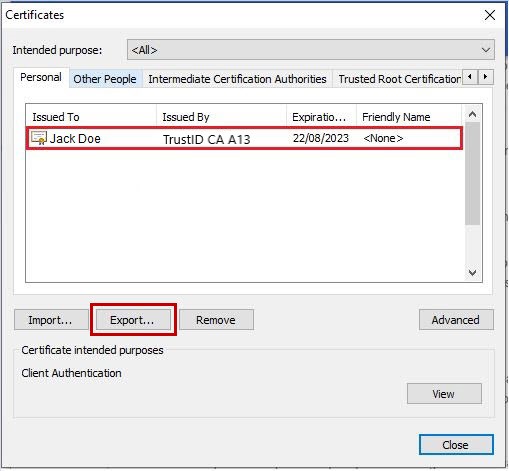
2. Select the certificate on the Certificate Manager window, click Export.
Image
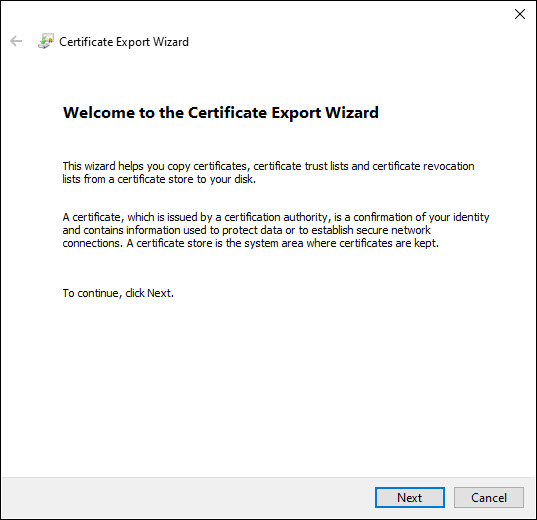
3. On the Certificate Export Wizard, click Next.
Image
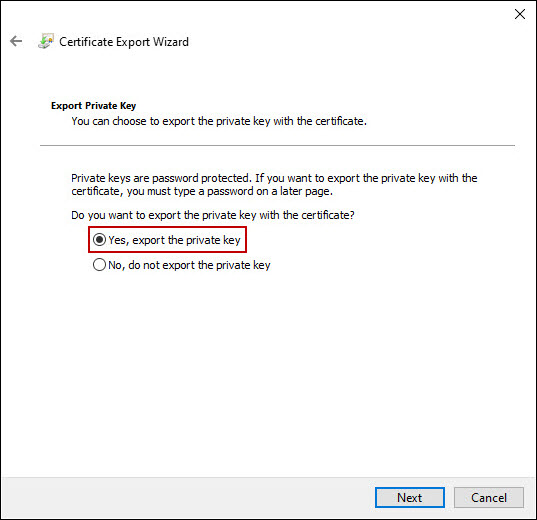
4. Select "Yes, export the private key", click Next.
Image
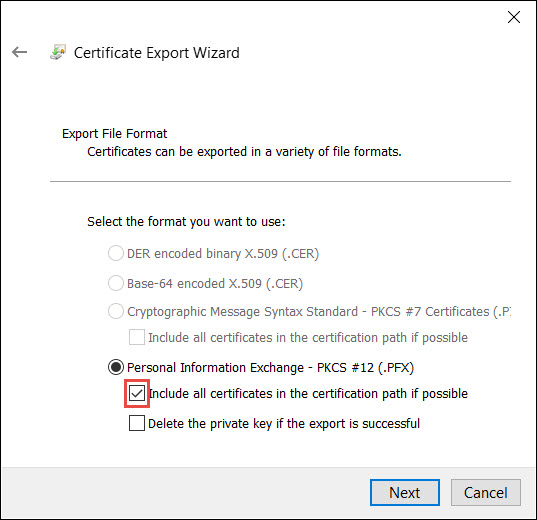
5. Keep the box next to "Include all certificates in the certification path if possible" ticked, click Next.
Image
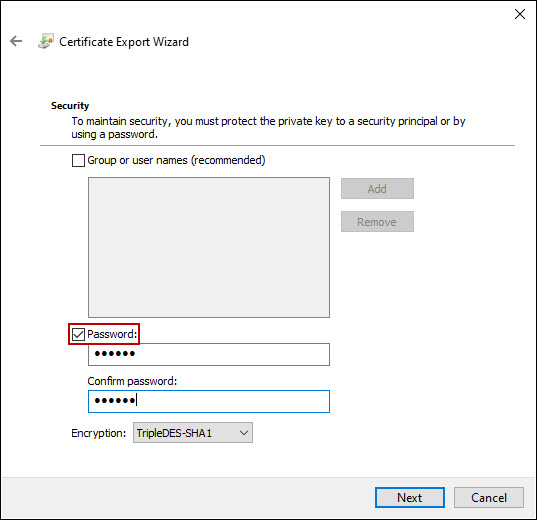
6. Tick the box next to Password, create the password of the back-up copy and click Next.
This password is required when you import the certificate into a different browser or when re-importing the certificate after a browser upgrade.
This password is required when you import the certificate into a different browser or when re-importing the certificate after a browser upgrade.
Image
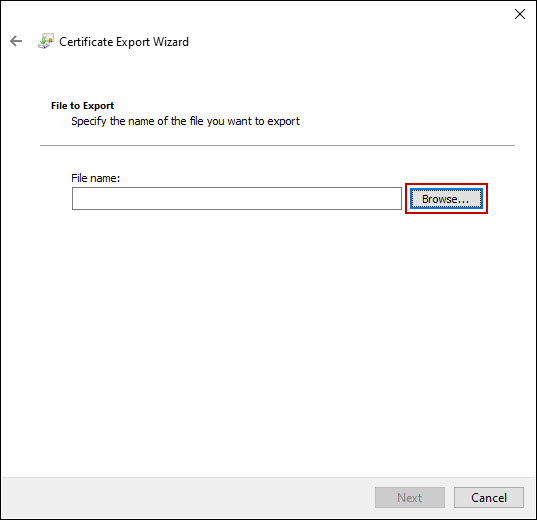
7. Click Browse.
Image
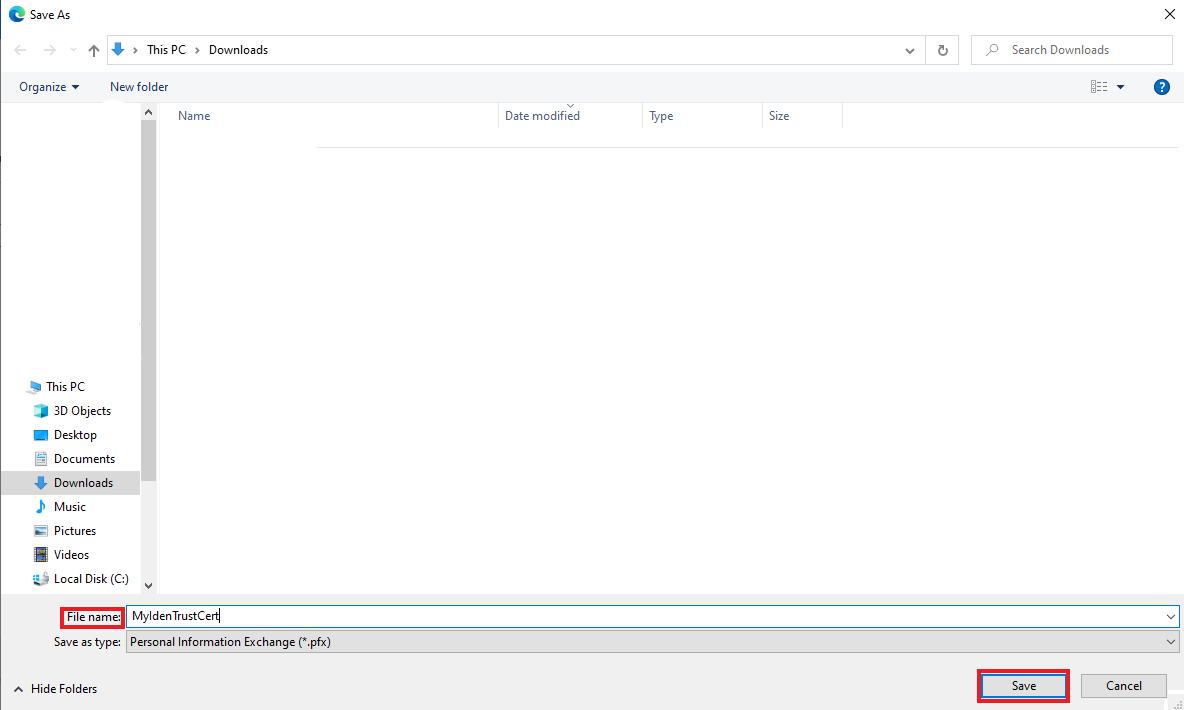
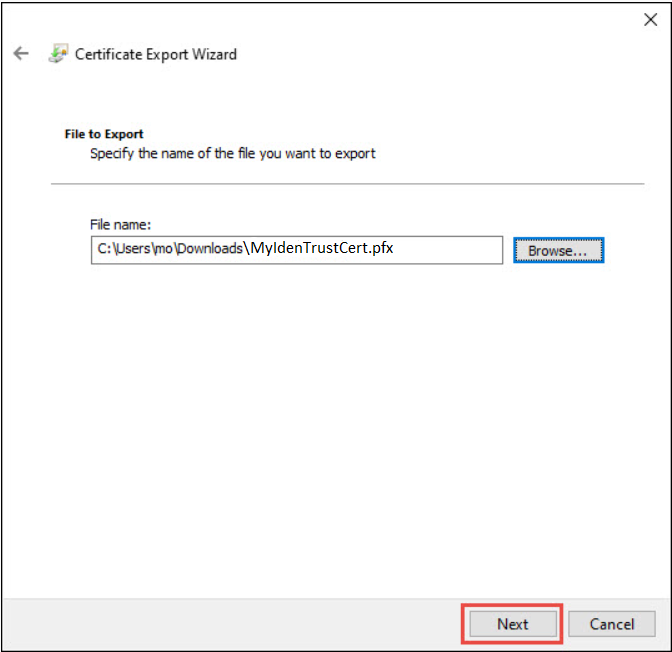
8. Choose a location to save the back-up copy of your certificate. Type a name for your certificate back-up copy the file extension (.pfx) will be added automatically. Click Save.
Image
9. Click Next.
Image
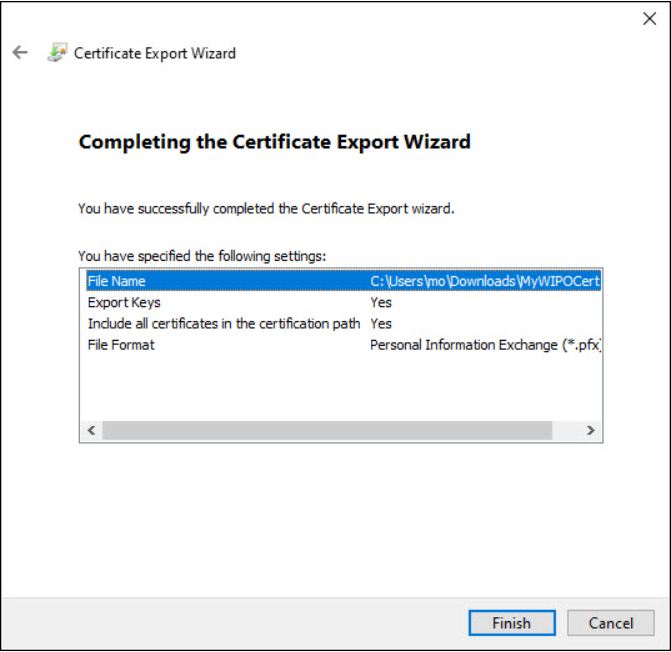
10. Click Finish to complete the export of the back-up copy.
Image
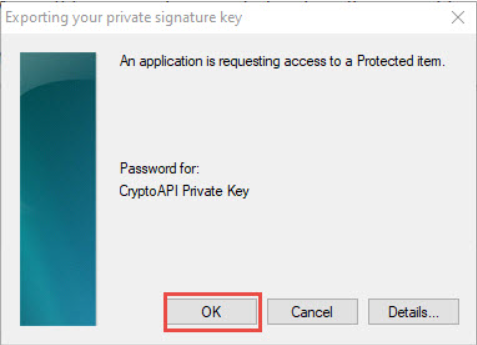
11. Click OK.
Image
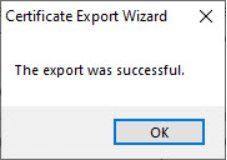
12. You will receive the confirmation "The export was successful". Click OK to close it.
Image
The back-up copy is now stored and can be copied and used on other devices. It also serves as a back-up in case of a computer or a browser change or upgrade when you may need to import the certificate.