
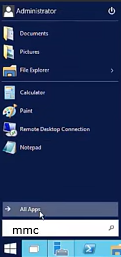
1. On the Windows server 2016 where you want to install the SSL certificate, open the Console.
In the Windows start menu, type "mmc" and open it.
In the Windows start menu, type "mmc" and open it.
Image
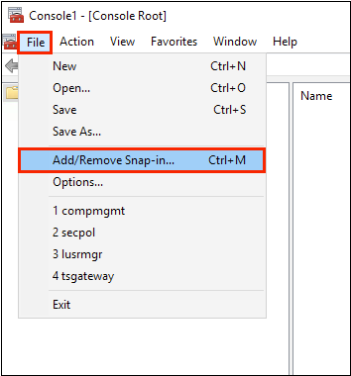
2. In the Console window, in the top menu, click "File >" and then, "Add/Remove Snap-in".
Image
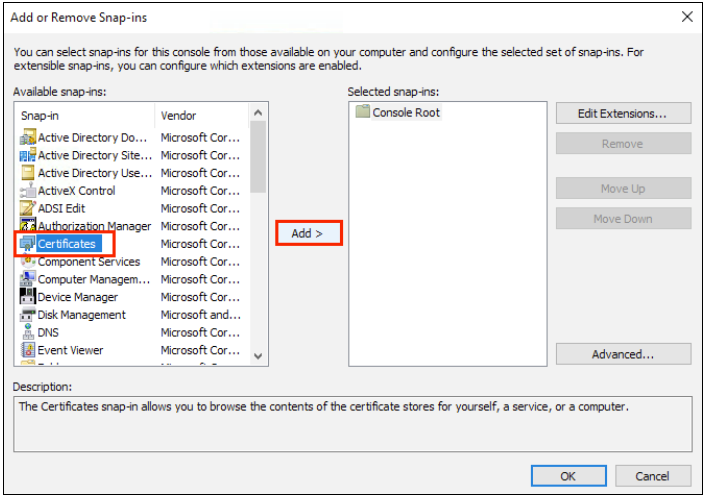
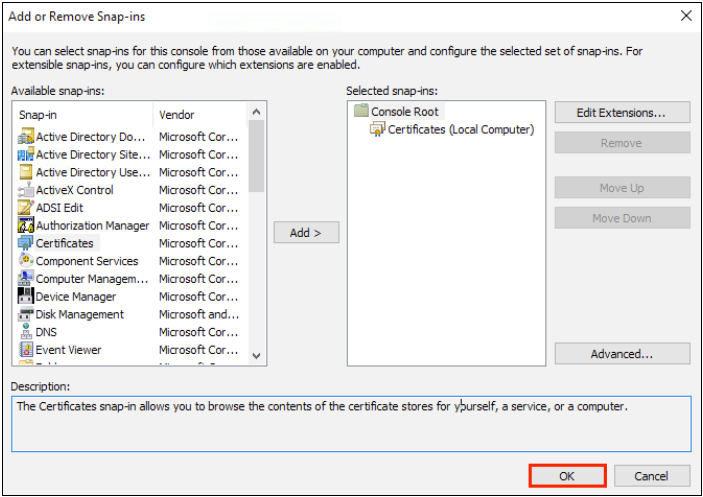
3. In the Add or Remove Snap-ins window, in the Available snap-ins pane (left side), select "Certificates" and then click "Add >".
Image
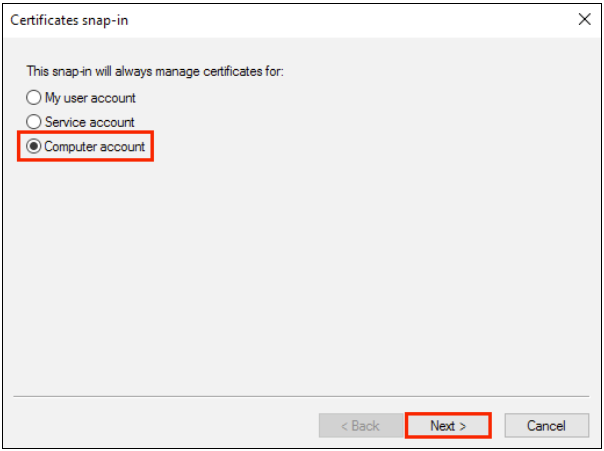
4. In the Certificate snap-in window, select "Computer account" and then click "Next".
Image
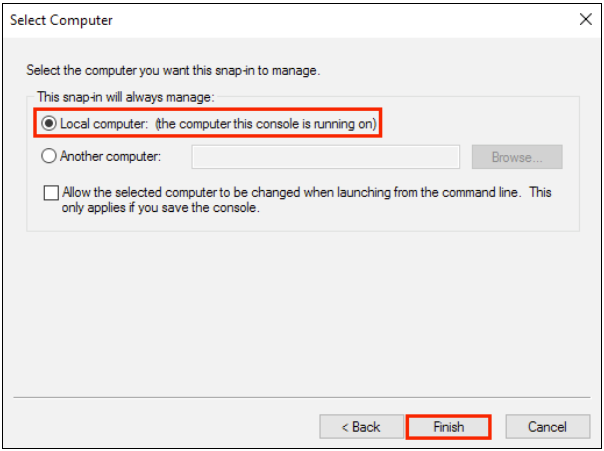
5. In the Select Computer window, select "Local computer: (the computer this console is running on)", and then click "Finish".
Image
6. In the Add or Remove Snap-ins window, click "OK".
Image
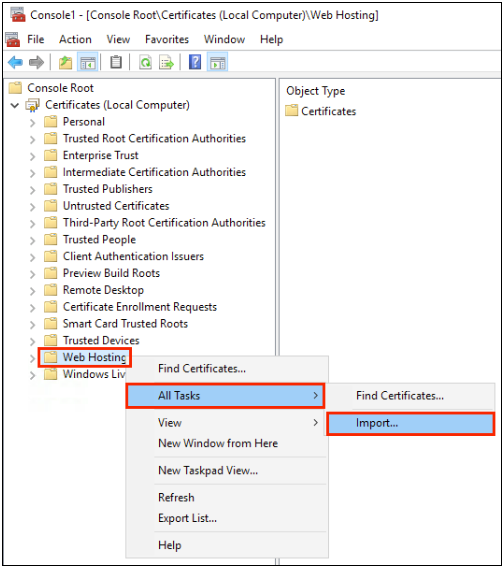
7. In the Console window, in the Console Root pane (left side), expand Certificates (Local Computer), right-click on the "Web Hosting" folder, and then click "All Tasks >", and then "Import".
Image
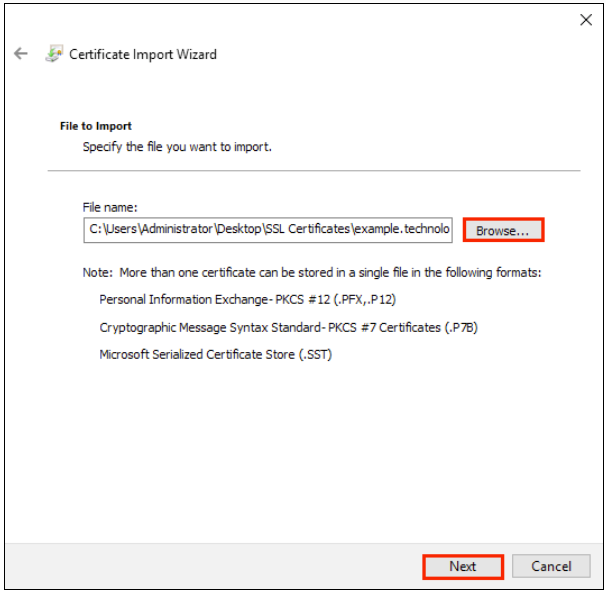
8. In the Certificate Import Wizard, on the Welcome to the Certificate Import Wizard page, click "Next".
On the File to Import page, browse to and select the file that you want import and then, click "Next".
9. Notes: In the File Explorer window, in the file type drop-down, make sure to select "All Files (*.*)". By default, it is set to search for X.509 Certificate (*.cert;*.crt) file types only.
On the File to Import page, browse to and select the file that you want import and then, click "Next".
9. Notes: In the File Explorer window, in the file type drop-down, make sure to select "All Files (*.*)". By default, it is set to search for X.509 Certificate (*.cert;*.crt) file types only.
Image
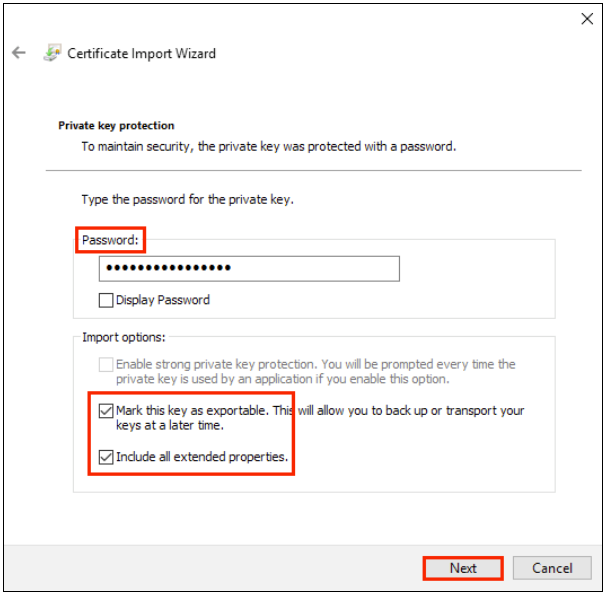
10. On the Private key protection page, do the following:
Password: Type the password that you created when the SSL certificate was exported
Mark this key as exportable: Check this box so that you can back up or export the SSL Certificate when needed. Note that a certificate without it's private key does not work
Include all extended properties: Check this box
Image
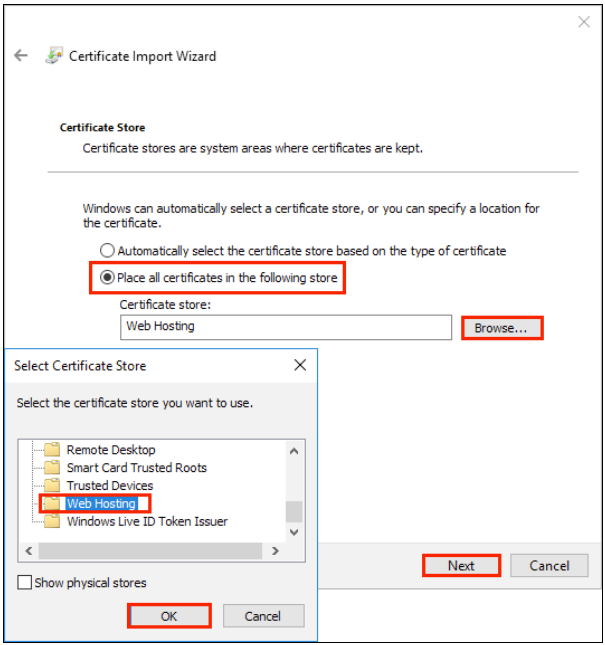
11. On the Certificate Store page, do the following and then click "Next":
a. Select Place all certificates in the following store and click "Browse".
b. In the Select Certificate Store window, select Web Hosting and click "OK".
a. Select Place all certificates in the following store and click "Browse".
b. In the Select Certificate Store window, select Web Hosting and click "OK".
Image
12. On the Completing the Certificate Import Wizard page, verify that the settings are correct and then, click "Finish".
13. You should receive "The import was successful" message. The SSL certificate w/private key .pfx file is now saved to the Web Hosting store (folder).
13. You should receive "The import was successful" message. The SSL certificate w/private key .pfx file is now saved to the Web Hosting store (folder).